
In this n8n workflow tutorial, you create a text summary from a PDF and post it as a new WordPress page. For n8n beginners and those interested.
If you work a lot with texts, you can quickly create your own content machine with this n8n tutorial and continue to refine it. This saves time in your day-to-day work and avoids repetitive tasks. Helpful for content editors, SEOs, online news teams as well as blog and website managers. Let’s go!
Overview: What does the content workflow do?
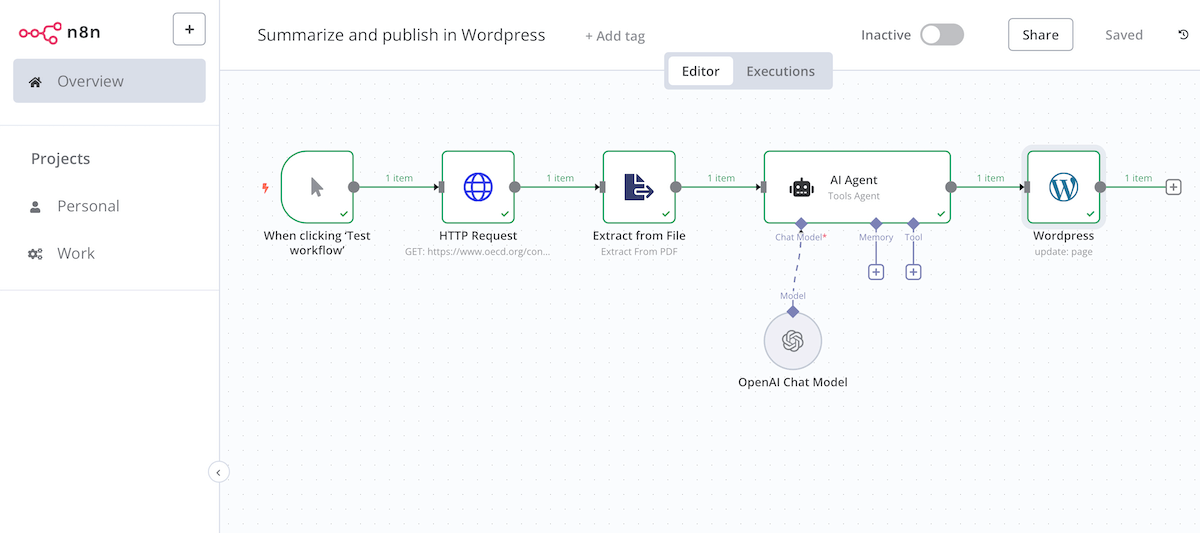
The workflow downloads a PDF from a website, extracts the first 5 pages and summarizes the document using the GPT model. The summary is then exported directly to WordPress.
Advantages:
- Summarize texts quickly
- Create content quickly and publish live
📖 This article is part of our AI Agents guide. Read the full guide →
Step 1: Create n8n workflow
Create the following nodes one after the other. You can simply enter these using the search box. You must enter your access data (credentials) for each new node. You will need an OpenAI API account and a WordPress account (username/password) with write access.
- Manual Trigger Node: The starting point for the workflow, in this case simply a manual trigger
- HTTP Request: Downloads the PDF
- Extract from File: Extracts the first pages of the PDF
- AI Agent: Summarizes the PDF
- OpenAI Chat Model: The AI model that the AI agent uses (e.g. gpt-4o-mini)
- WordPress: Saves the summary directly in WordPress
HTTP Request:
- Method: GET
- URL: Select any PDF from the web, e.g. the OECD Climate Report 2024
Extract from File:
- Options: Max Pages: 5
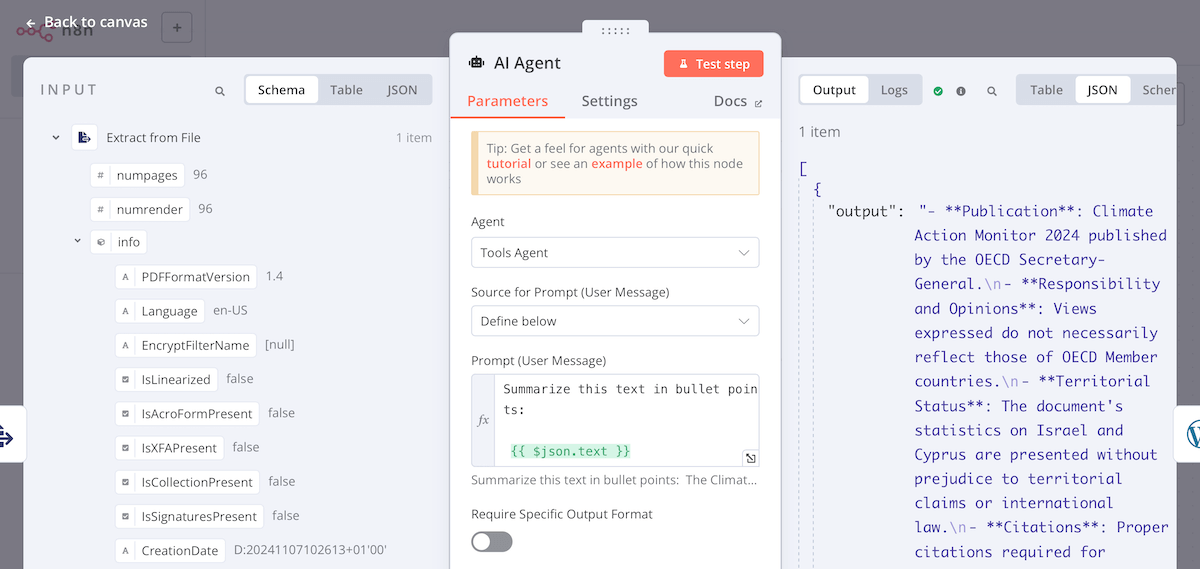
AI Agent:
- Prompt: “Summarize this text in bullet points: {{ $json.text }}”
- This integrates the text field from the previous node into the prompt
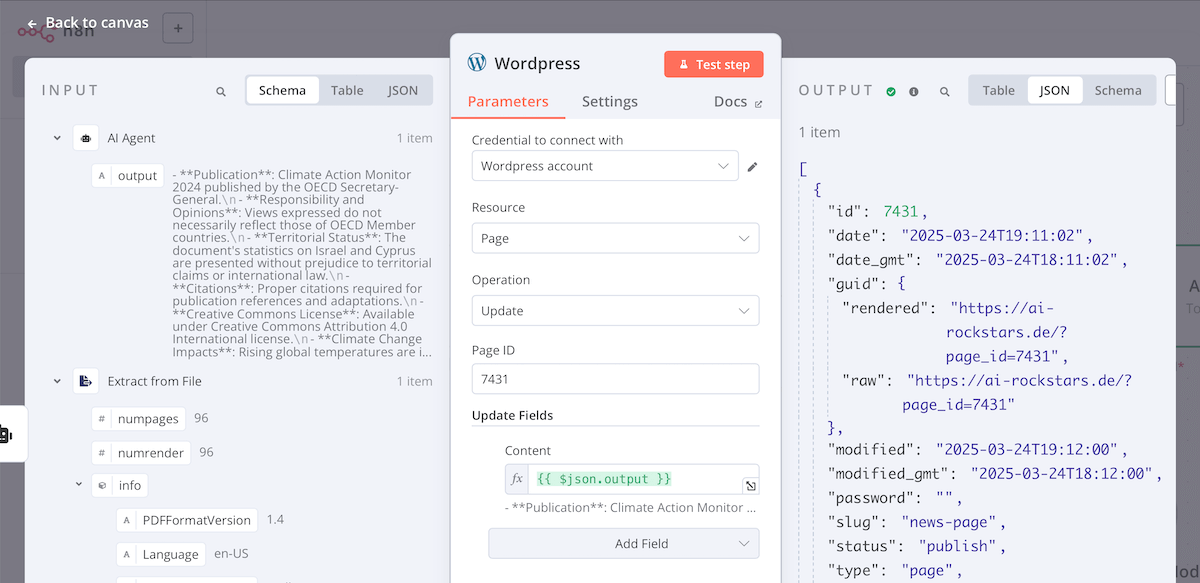
WordPress:
- Resource: Page
- Operation: Update (we want the existing article to be overwritten)
- Page ID: the ID of your article, see step 2
Step 2: Create WordPress page and find page ID
We create a new WordPress page (not a post, but a page). This should automatically display our summaries. When you create the page, you will see the ID of the page after saving it. Make a note of it and enter it in the n8n workflow.
/wp-admin/post.php?post=7431&action=edit&classic-editor
Step 3: Start workflow
We start the workflow with the “Test workflow” button in n8n.
Within a few seconds, the article is now downloaded, summarized and updated in WordPress. Here is the result in WordPress.

Next Steps: Customize content workflow
This content workflow is kept very simple so that you can follow it quickly. The following improvements would be ideas for the next steps:
- Import many documents instead of just one article:
Adds a Google sheet with a list of documents to be summarized for this purpose - Import HTML pages:
If you do not want to summarize PDFs but HTML pages, you can also achieve this with the HTTP request node. However, it is not possible to download all websites with this method as modern websites load the content dynamically. You would need a scraper node for this. - Add articles instead of replacing them:
First loads the existing content on the page and then adds the new summaries to it - Format article:
Choose HTML as the format to format the article appropriately, e.g. with headlines, bullet points and other formats.
Good luck creating your personal content tool.
Take a look at our other tutorials.


